Wond: A Wifi dongle for collaborative LiveCoding in FoxDot/Troop

FoxDotSpot Dongle
The FoxDotSpot Dongle is a RaspberryPi Zero W, that runs an offline Wifi Server with a hotspot for users to connect to. Furthermore, you have the option to connect this server to the internet and connect to the OS via ssh.
How to get it started?
Just plug the dongle into a power supplied USB slot, directly to a plug or into a Pc/Laptop, and off you go.
After a minute, you will be able to connect to a Wifi Hotspot with the name and password below:
SSID: Wifi4DS
Password: 25M4Ei7[89
Then start SuperCollider with FoxDot.start and Troop >> python3 run-client.py
Host: 10.3.141.1
Password: jam@ctrlreturn
Shutdown the Wifi Server OS:
Press the little button longer than a second, and wait till the green LED is off.
Unplug the dongle.
Thats it!
D.I.Y. Instructions
What do you need?
- Raspberry Pi Zero W - 19.49 €
- SD Card 32GB - 5.99 €
- Male USB to DIP Adapter Converter 4pin 2.54mm PCB Board - 1 €
- Micro Push Button 665mm 4pin - <1 €
- PLA 3D Print material
- 4 short wires
- 2 screws for USB Module, 4 Screws for the case
- Soldering gears
- Some isolation tape to protect electronic parts
First, lets build the hardware:
1. Connect Usb Module with Raspberry Pi
1.1. Take wires, Usb Module, and Rpi and solder it together like the images shown
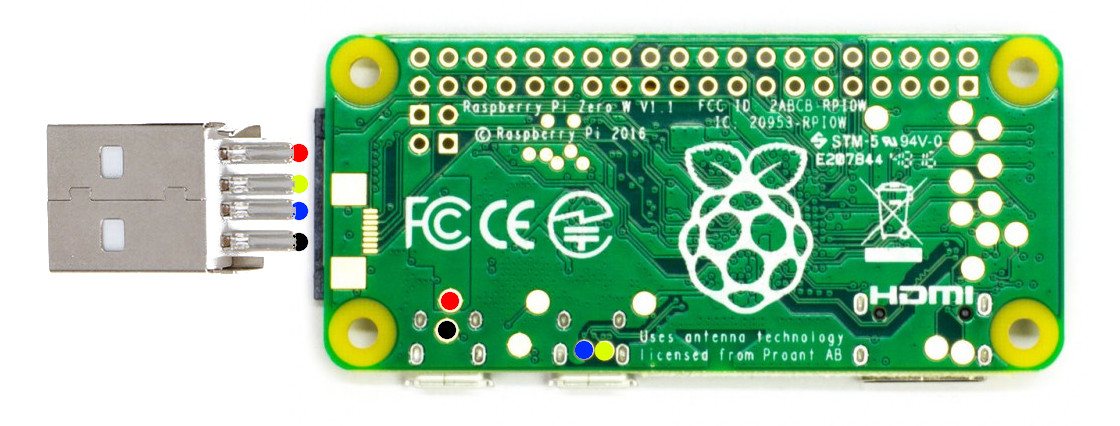
1.2. Use isolation tape to avoid short circuit. You do not need to hot clue the use onto the RPi board, if you bought a Usb module with board.
This can be srewed to the case later on.
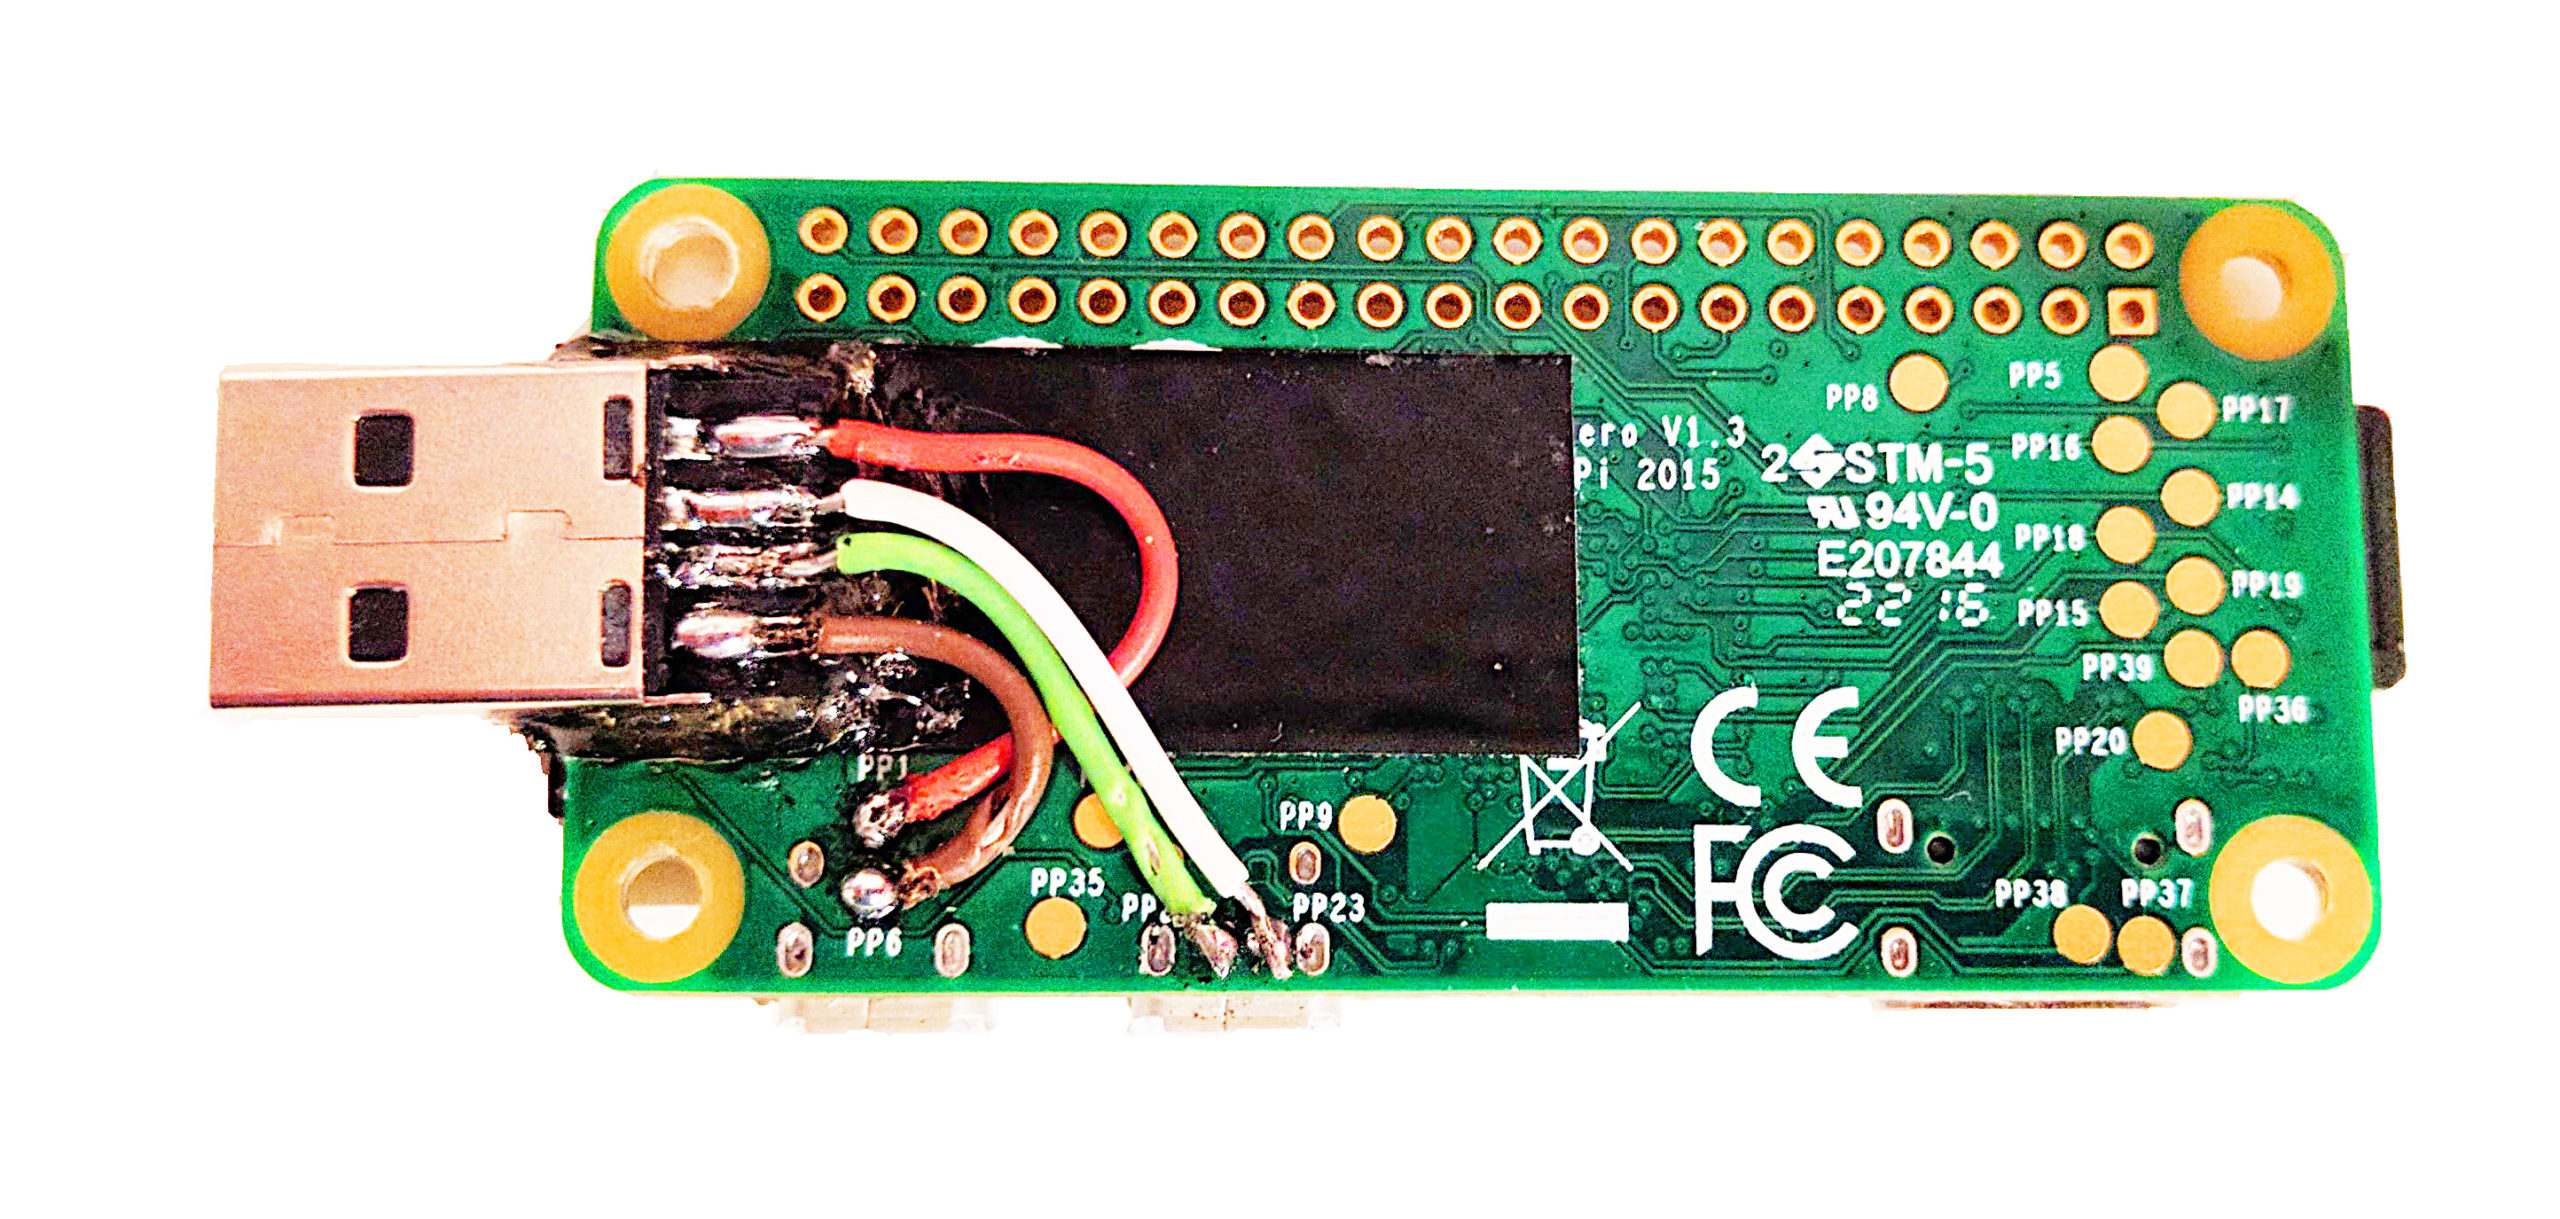
2. The Shutdown Button
2.1. Cut the unused legs off. Check the image which ones. I used a multimeter to test the currency flow to be sure.

2.2. Plug the remaining legs into the GPIO pin holes like shown. Red is GPIO20, which is used by the OS to trigger the shutdown, Black is Ground. Use some isolation tape between the cut-off legs of the button and the board to avoid short circuit.
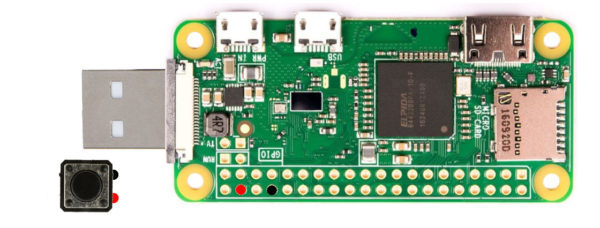
2.3. Solder the legs to the RPi board. The board should now look like shown in the image below:

3. The Printed Case case
In case you do not have a 3D printer, there are ways to build a case without it Example: Tic Tac Case
3.1. Download the FoxDot Dongle Case
3.2. Load this 2 STL files one afte another into Slic3r or your preferred slicing software.
(I used PLA, a 0.4 Nozzle, and scaled models up 1% as counteract to shrinking process while cooling)
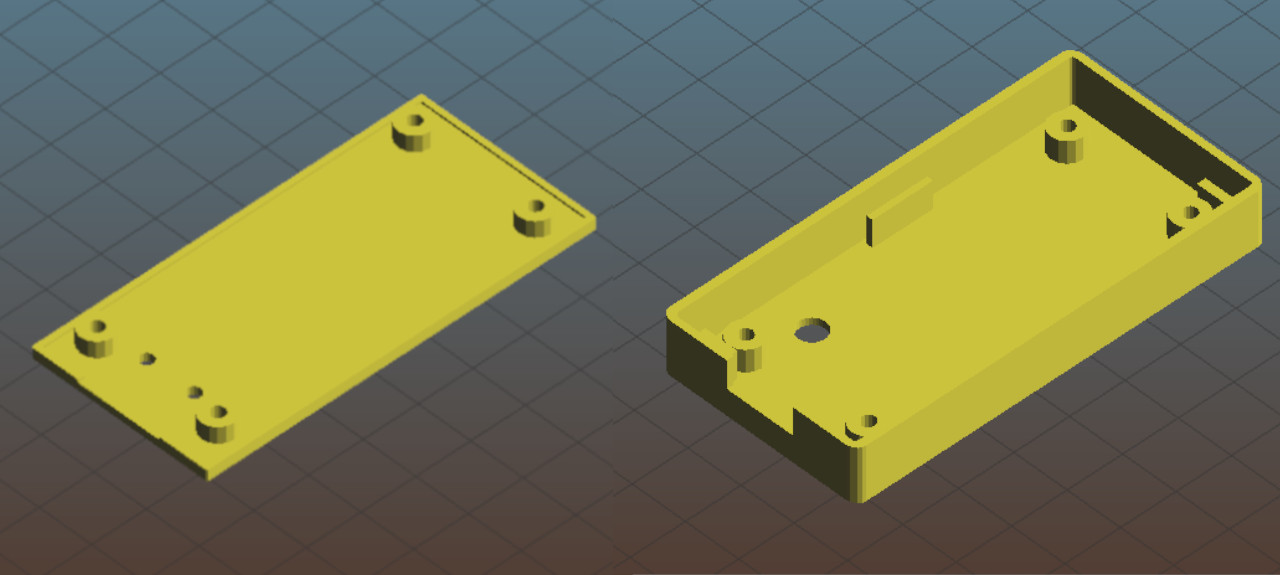
3.3. Test after printing, if it fits, but do not screw it together. We need to install the OS and slot in the SD card.
Secondly, lets install the software:
- Download and install Etcher
- Download and extract the FoxDotSpot SD Image
- Connect an SD card reader with the SD card inside.
- Open balenaEtcher and select from your hard drive the FoxDotSpot .img
- Select the SD card you wish to write the image to.
- Review your selections and click \'Flash!\' to begin writing data to the SD card.
- Take the SD card out of the reader and slice it into the RPi slot.
- Run in the first time, before you close the case
Thirdly, in to the case and done:
-
If everything, worked out, you should see the green LED flickering, after you plugged in the dongle
-
Wait till the green LED lights up permanent

-
Now, you should see FoxDotSpot in available Wifi Connections * Click on it, and use the password: jamsession2020
Now you should be able to start using Troop
In case you want to access the GUI of the offline server as administrator (e.g. changing password)
-
Open a browser and type in 10.3.141.1
-
Login with user name: admin, and password: jamadmin2020
In case you want to access Raspbian via ssh connection, you will need following details:
Hostname: wifiserver (or 10.3.141.1)
Login: pi
Password: offline2020
If you want to get internet for the FoxDotSpot Dongle, you will need to create a Hotspot on your phone or computer with following details (This settings are manually set in Raspbian OS of FoxDotSpot Dongle)
SSID: 4RPiZero
Password: fe3556d042ec
Be aware this option remains untested. It has been used to install and configure the dongle OS