CyberDreamer
CyberDreamer
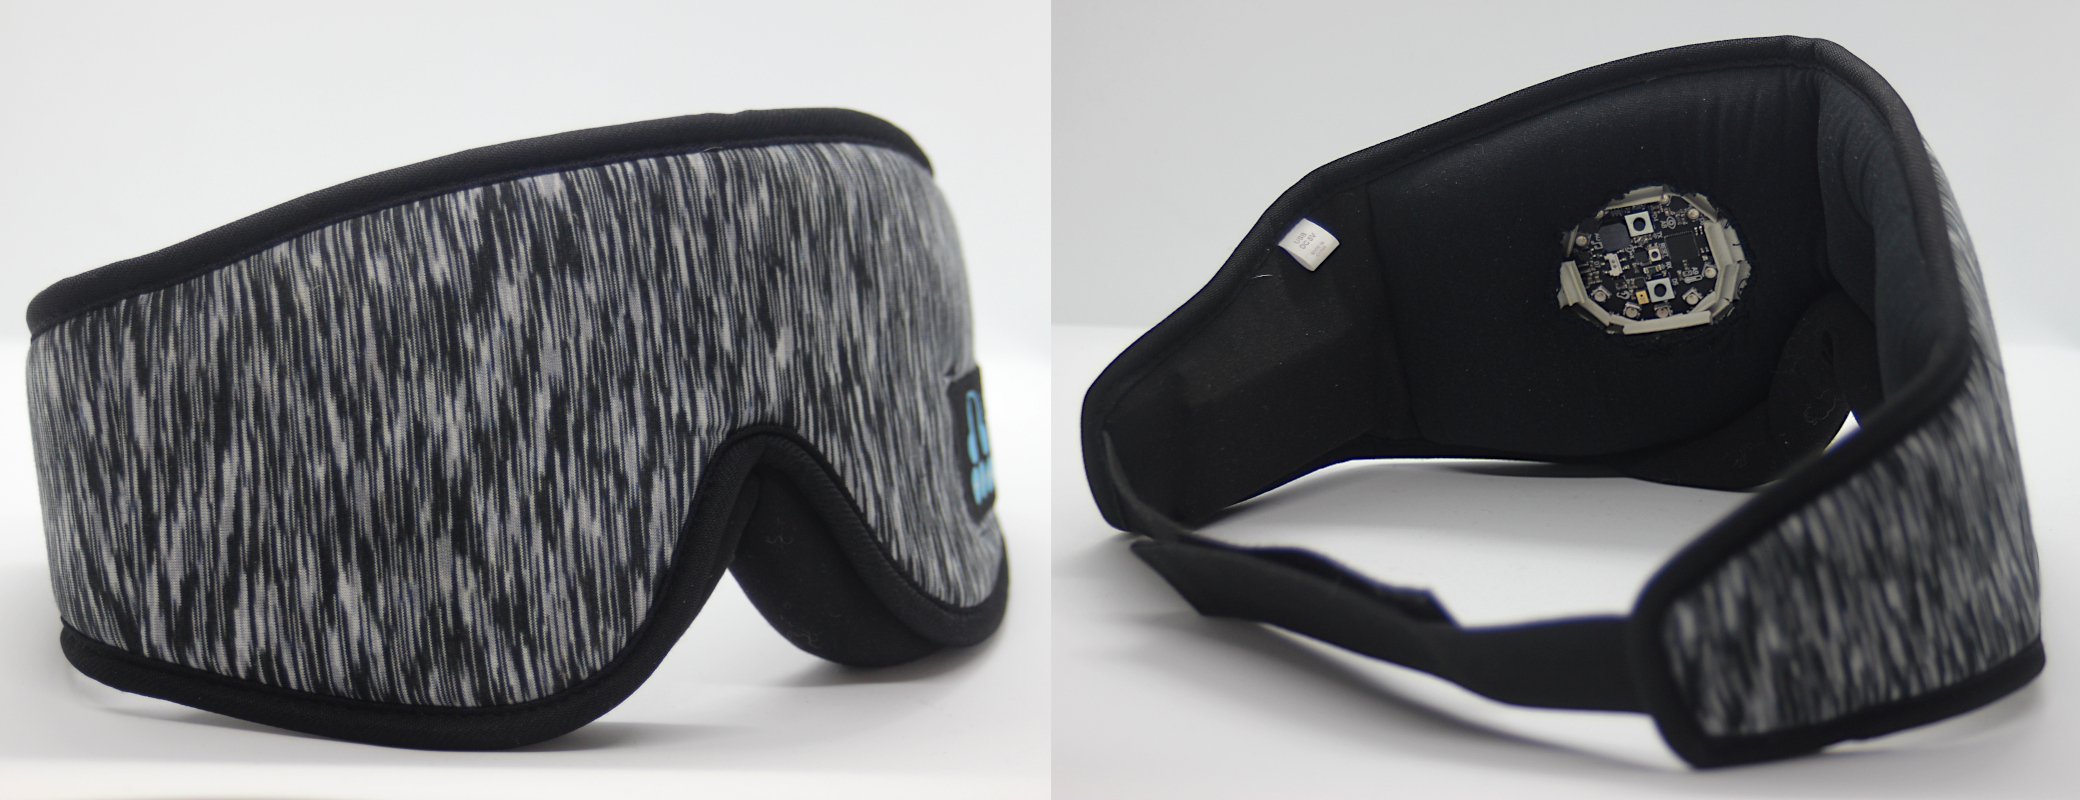
The CyberDreamer is a sleeping mask, that will help you to experience lucid dreams.
Project link: https://gitlab.com/DigitalStages/cyberdreamer
Introduction
-
I bought a remee sleeping mask, which absolutely does not work to support lucid dreaming. It is a device, which only are programmable online with certain timing and light patterns. ! IT DOES NOT REACT ON REM (RAPID EYE MOVEMENTS) THAT INDICATES DREAMING PHASES!
-
On my search to find affordable masks, that reacts on REM, or rapid eye movements I came across this blog post:
https://jabituyaben.wixsite.com/majorinput/post/lucid-dreaming-with-the-circuit-playground-express -
So I modified the code and the mask to make it a proper sleeping mask (at least in my opinion)
| 1. Components |
|---|
 |
- 1 x LiPo Akku 3,7V Lithium Polymer Battery 2-Pin JST-PH Plug 1200mAh
- 1 x Adafruit Circuit Playground Express, 3.3V, 48MHz, Arduino/MakeCode/Python, 3333
- 1 x Universal Printed Circuit Board
- 1 x GY-TP4056 USB Li-Ion Charger module 5V 1A
- 1 x Bluetooth sleep googles
- 1 x Mini switch
- Wires
- Thread and needle
- Some soft rubber and some Velcro
| 2. Soldering |
|---|
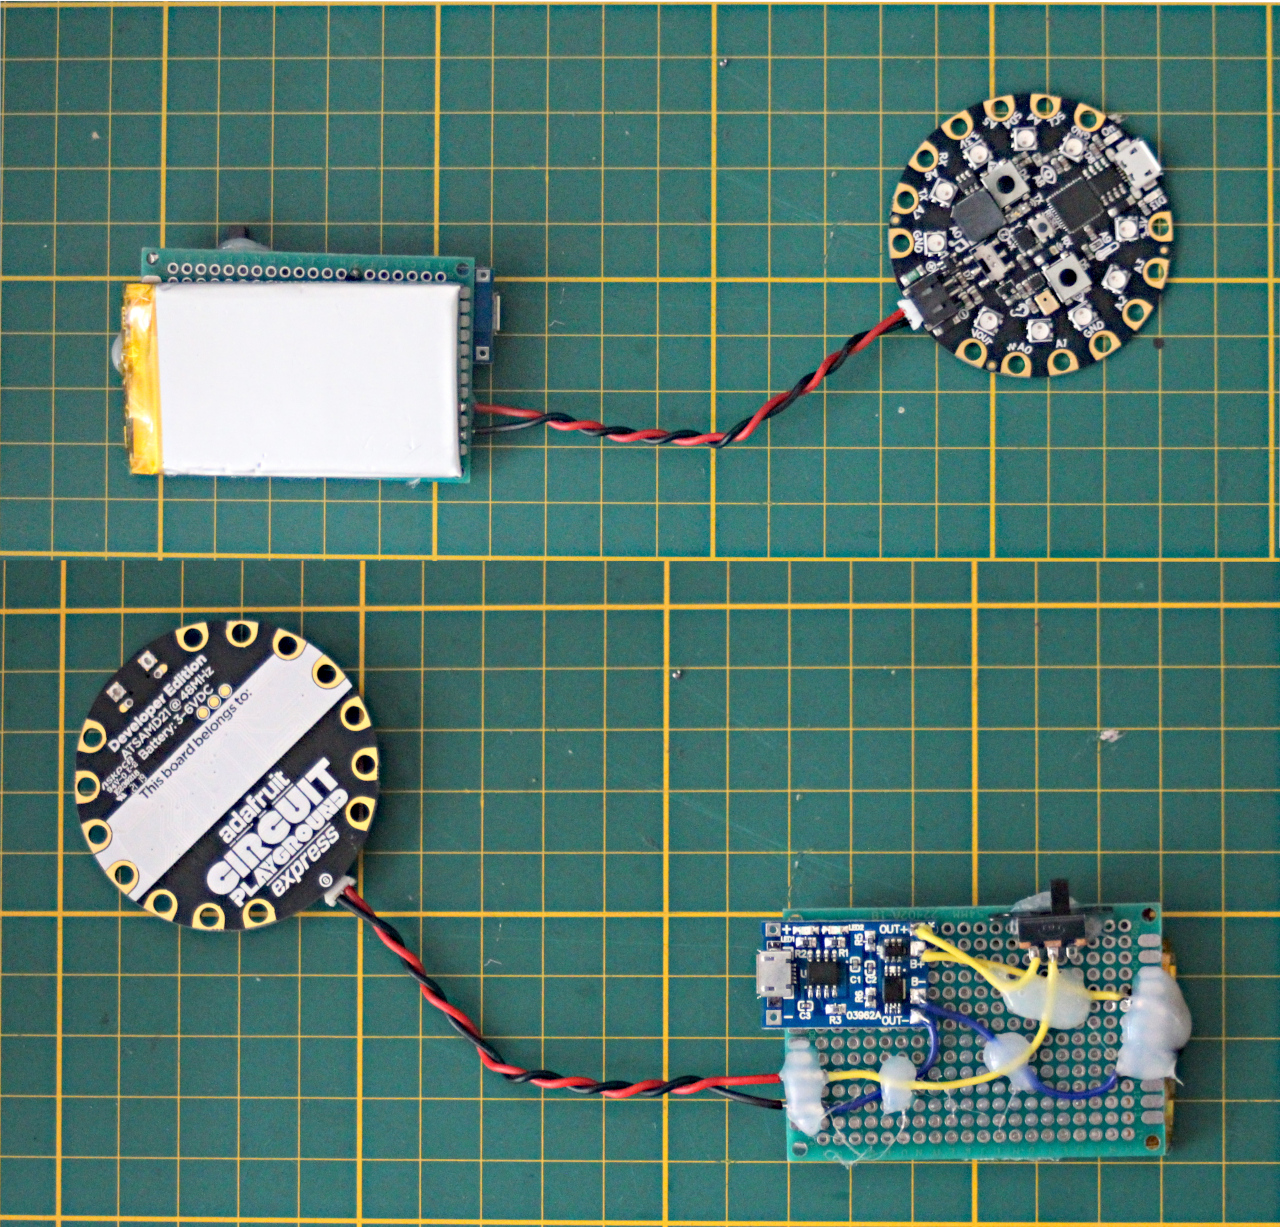 |
- USB Charger module >> CircuitBoard
- Cut the wire of the battery >> Leave enough cable to place the battery on the other side of the board!
- Attach the battery wires onto the board
- Extend the battery wires, which then get attached to the charger module (B+, B-)
- Solder the wires of the battery wire with plug to the board
- Connect Out + to the switch via cable, then solder it to the battery wire with plug (+)
- Connect Out - to the battery cable with plug via wire
- Attach battery, switch and wires using hot glue
| 3. Sleeping mask |
|---|
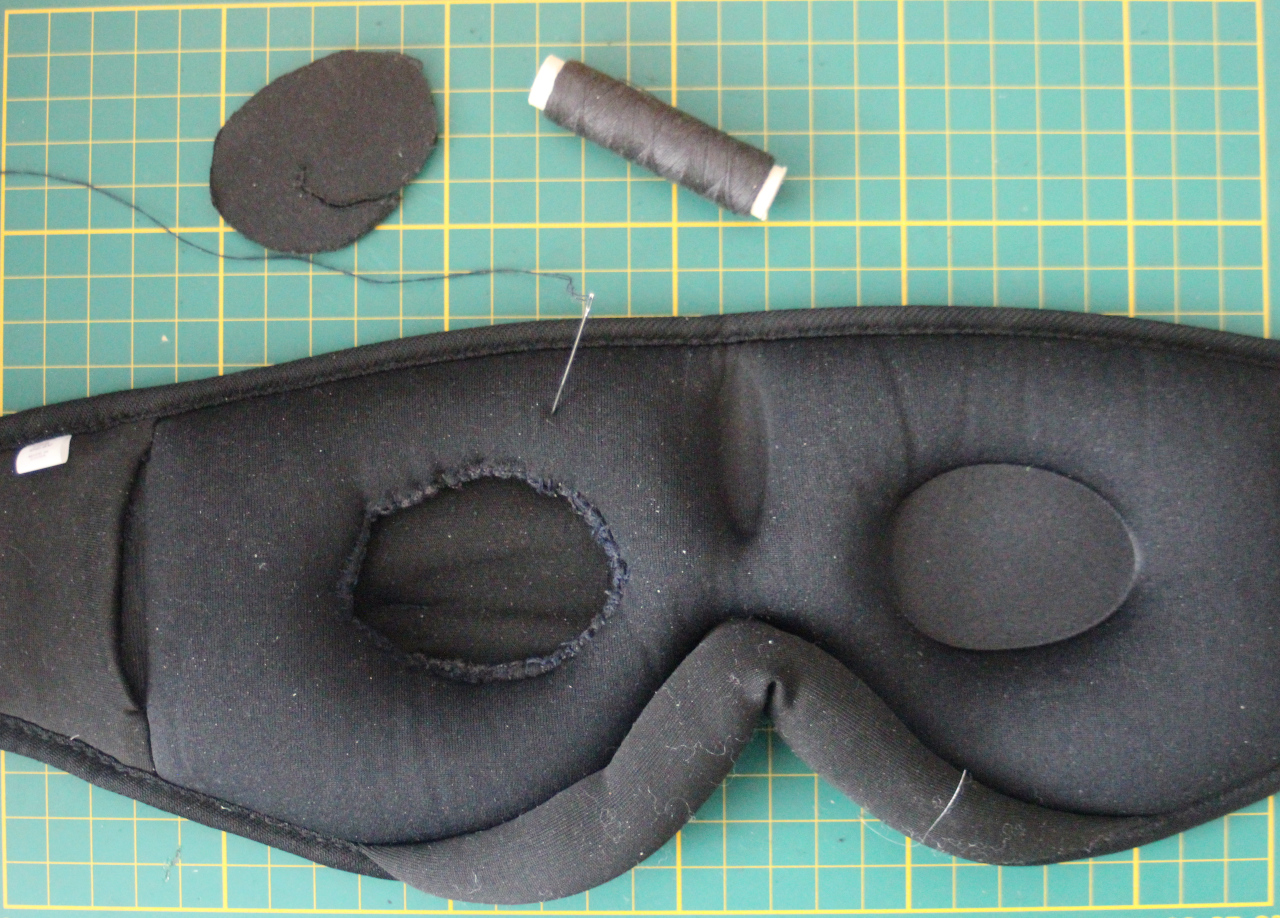 |
| 1. Remove electronic components, if the sleeping mask has some (like in my case, which is good, as it already has pockets) |
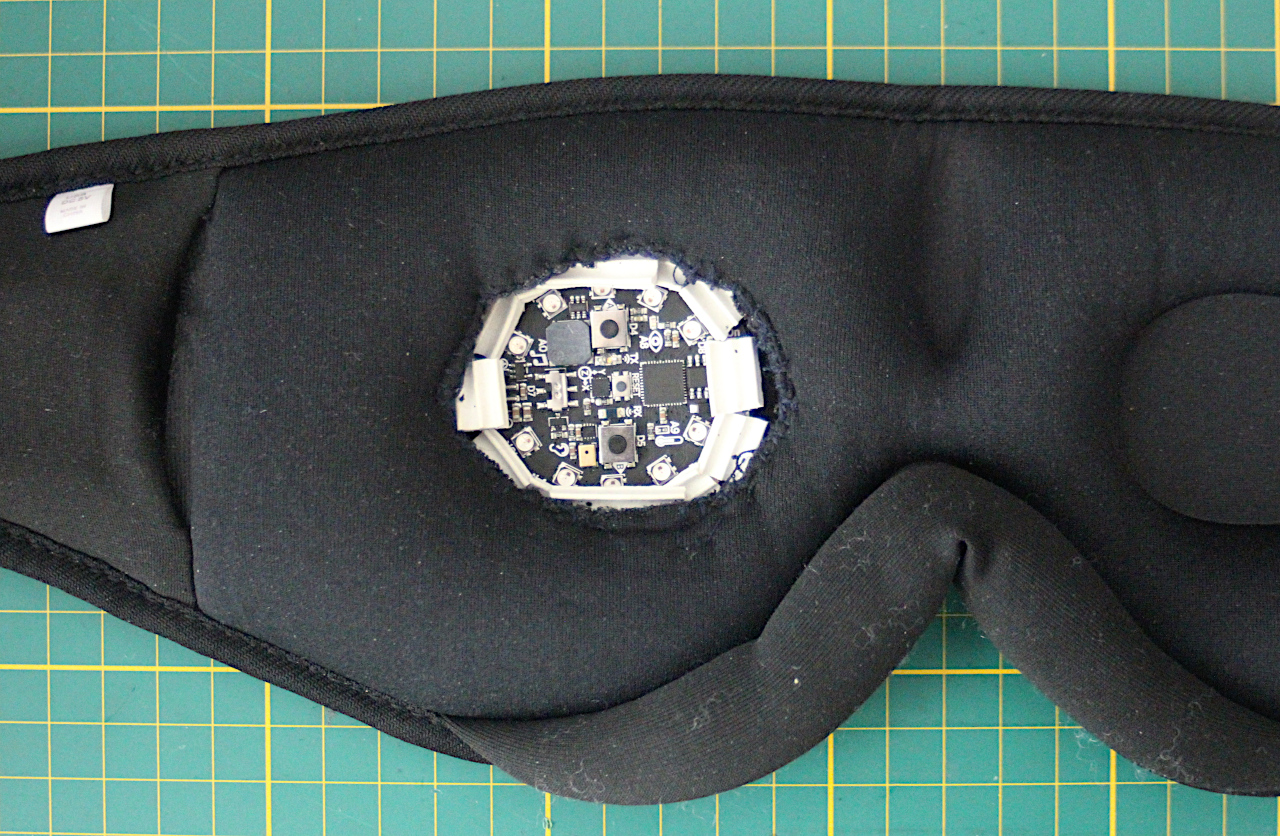
| 2. Cut a hole into the eye area, and use the needle and thread and stitch the cut edge |
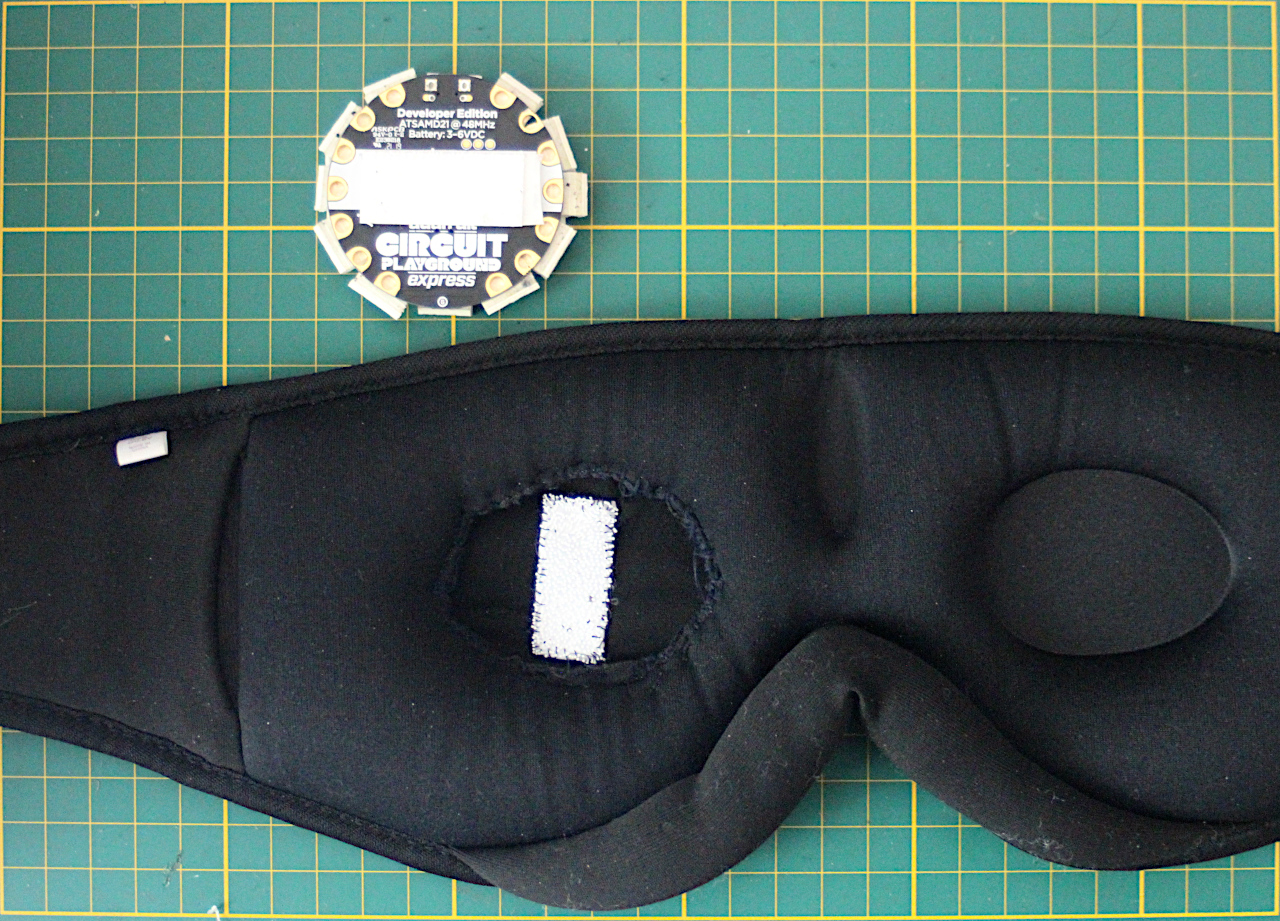 |
| 3. Attach Velcro on the backside of the Adafruit Playground Circuit Express board with clue and stitch the counter part to the mask to its right position |
| 4. Adafruit Playground Circuit Express |
|---|
 |
| 1. Connect the board to your computer |
| 2. Install PythonCircuit https://learn.adafruit.com/welcome-to-circuitpython/installing-circuitpython |
| 3. Copy all files from /code to "CIRCUITPY" |
| 4. Replug the board to the computer, and check, if "CIRCUITPY" is writable. If not, do not do anything. However, if you still can write on the board, you need to switch "D7" on your APC board. This is important to make the program work, after you unplugged it from your computer |
| ! If you want to change the code (times or so), you need to switch "D7" to make it possible to save the changed code. After you saved it, you will need to switch "D7" again back to read-only ! |
| 5. Put it all together |
|---|
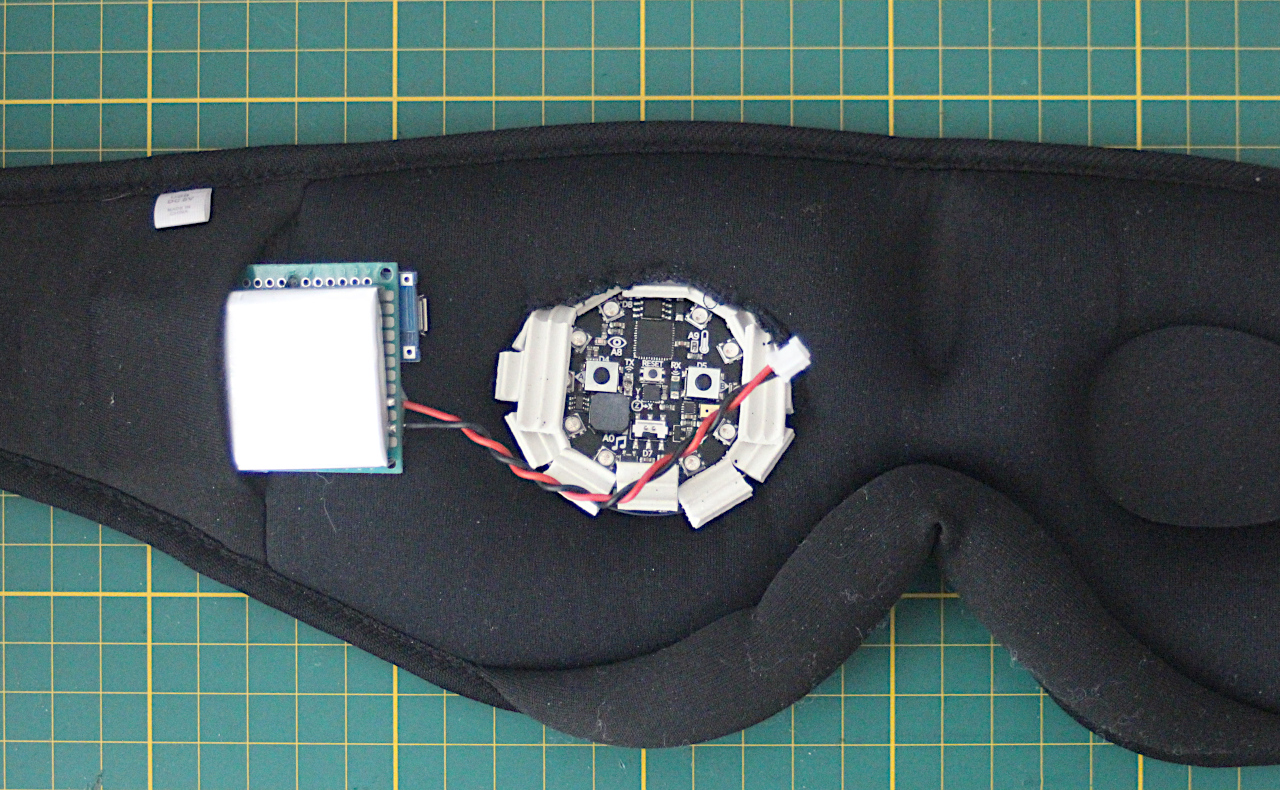 |
| 1. Put the board with battery into place with the cable and micro usb socket on the open end |
| 2. Place the APC board underneath the open eye area |
| 3. Connect the cable |
 |
Usage
- After you switched on or connected the Adafruit Playground Circuit Express to a power source, you will have 20 seconds to change the 2 available settings
- LED BRIGHTNESS: The LED ring will light up green. Each time the button gets pressed, it will increase the brightness. Leave the brightness you like and wait 5 seconds. A rainbow ring will confirm the settings being applied.
- WAITING TIME: The second button will change the time, that the device will wait, till it looks for eye movements. The LEDs will light in red. Each led represents 30 minutes. Keep it the time you want the device to wait, till it looks for rapid eye movements. Also here, wait for 5 seconds to confirm the changed settings.
- If the settings have not changed, after reconnecting the device, try changing the position of "D7" on the APC board.
If there are any issues, please contact me. Cheers!
Update 14/05/2021
| Hardware |
|---|
| 1. After my first trial nights, I recognized, that it would better for me to extend the dc wires and move the battery switch board to the other side (I am side sleeper, most of the night on the left side...my nose grew in that direction X-D) |
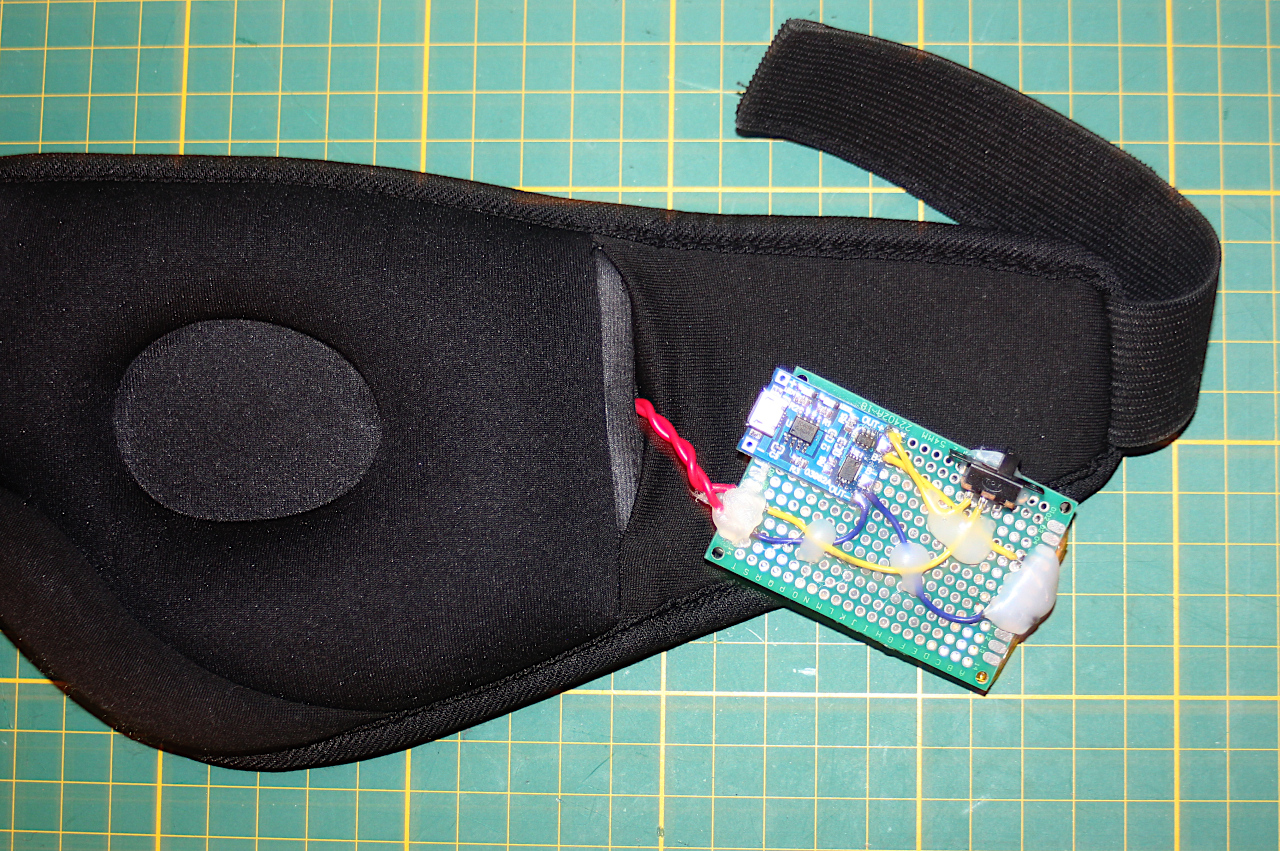 |
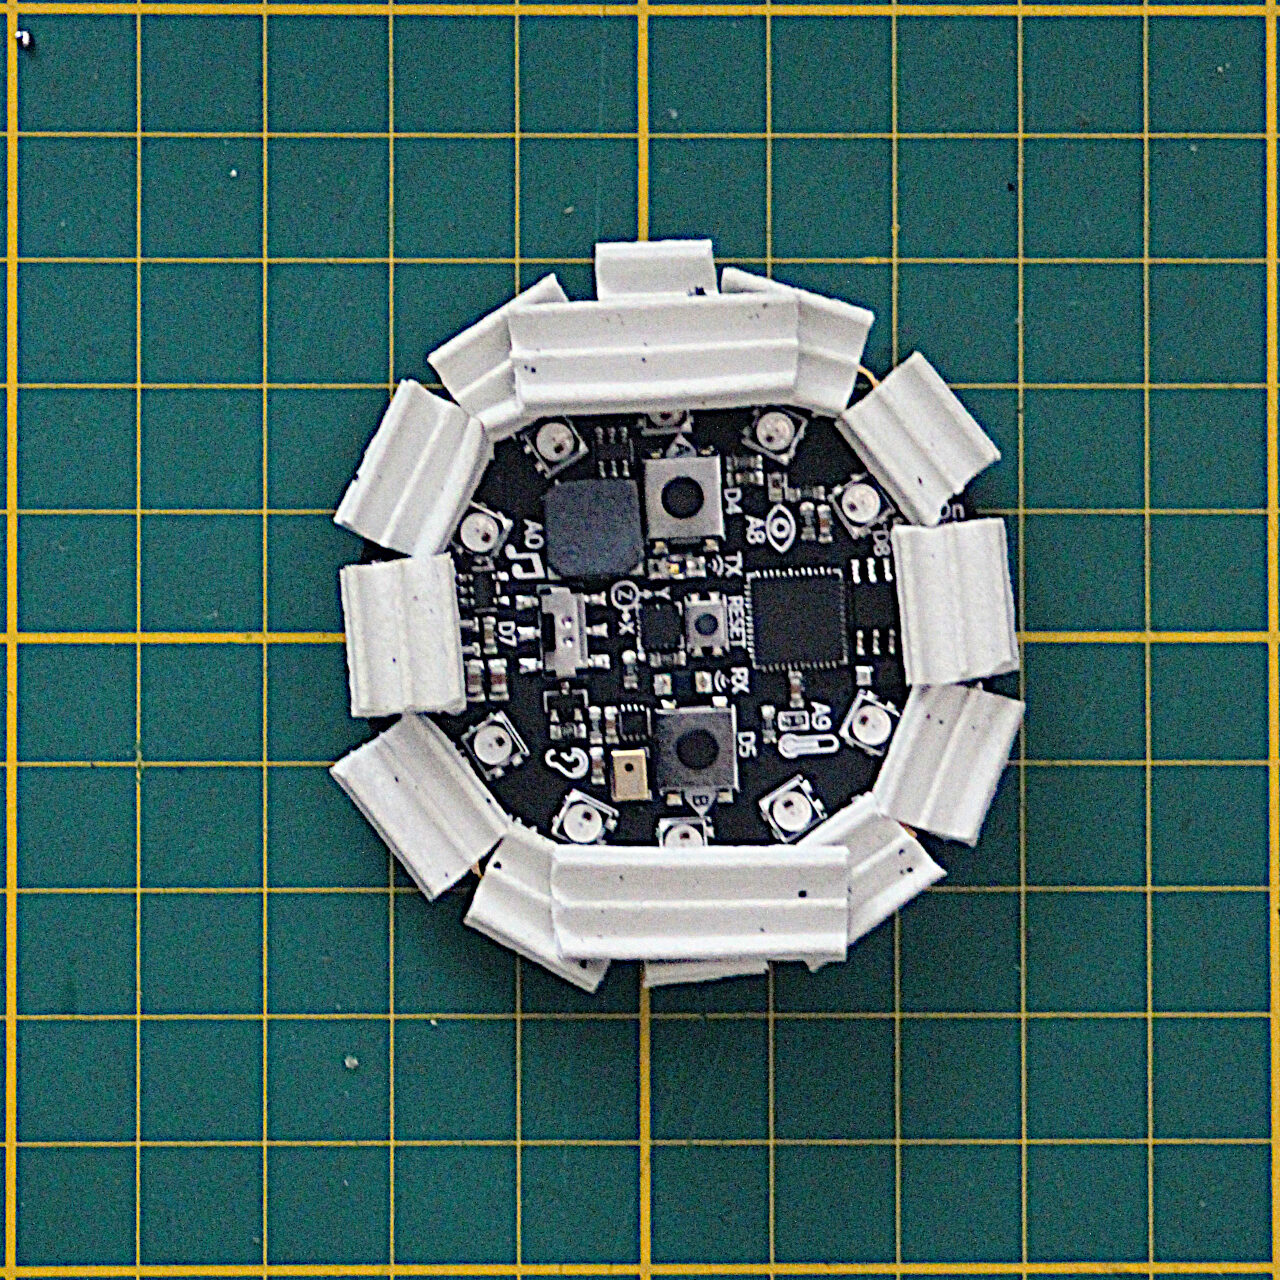
| 2. To keep a safe distance between the eye and the APC board, a 3D printable design has been added. It is possible to use PLA Filament for it (which I did), but a soft filament might increase the sleeping experience. |
| 3. Screws (4x) for the APC board to be attached to the eye module + 4 little bops of hot glue to attach the mask to it on the other side. A voila! This is my hardware final! |
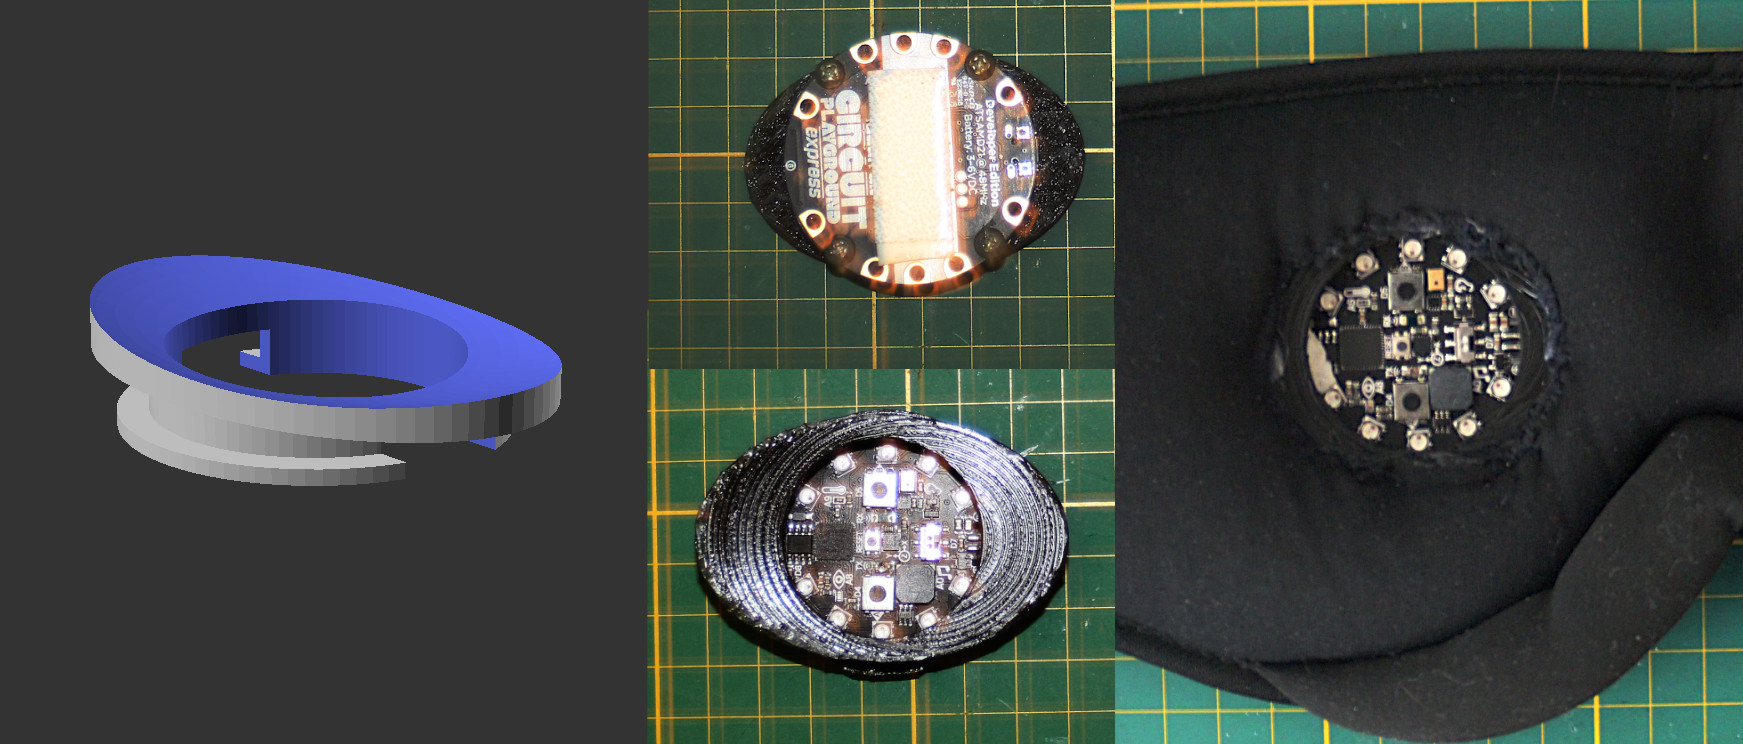 |
| Software |
|---|
| First of all, I did upload the wrong code (an older version). Then I realized, that like the NovaDreamer mask, I would like to have all LEDs light red. It should increase the possibility of lucid dreaming (it needs practice to recognize the cues) |
| I will continue to change to code according to my experiences. Thats all folks! |